
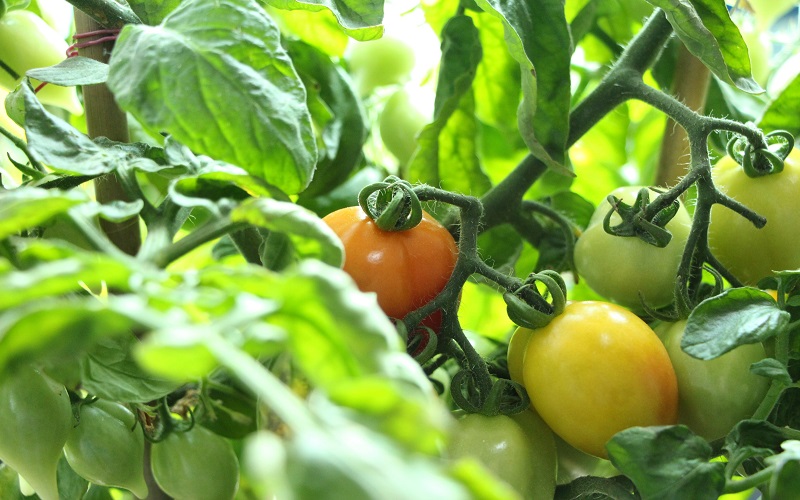
Everyone who has ever grown tomatoes knows that the most delicious tomatoes are home-grown and have a complex and delicious flavor unrivalled by store-bought tomatoes.
Tomatoes are one of the most versatile and internationally consumed fruits. Eaten fresh, cooked, whole or in sauces, it’s used to prepare food from all corners of the globe. While available in almost every supermarket, commercially produced tomatoes lack the sweetness, texture, color, and flavor of a locally produced tomato.
Tomatoes need proper nutrients, watering, lighting, temperatures, humidity, ventilation, space, maintenance and support to provide a large yield. Unfortunately for many people, there may be limitations on their ability to properly grow tomatoes due to their climate or space. Particularly who are living in a tiny apartment even they don’t have a balcony. For this reason one might ask oneself; is it possible to grow tomatoes inside apartment? It may be easier than you think to install a successful tomato growing system inside apartment that will produce fresh tomatoes in any climate or season!
Yes, you can be growing tomatoes even in the winter!
Choose A Suitable Variety
While there are over 10,000 varieties of tomatoes, there are 2 main categories that are important to consider when choosing what type to grow; whether the variety has determinate or indeterminate growth.
Determinate Tomatoes
Determinate tomatoes are short and bushy, typically growing between 3’-4’ and are known as “Bush Tomatoes”. Their lifecycle is quick ranging from 45-90 days. In general, these varieties are less labor intensive and don’t require much pruning nor complex trellising structure. Determinate tomatoes are better if you have a short growing season or Small spaces or are planting late.
For the best result in inside growing environment some popular determinate varieties are..
- Cherry Gold
- Red Robin
- Toy Boy
- Tiny Tim
Indeterminate Tomatoes
Indeterminate tomatoes are large vining, longer lived and thus prefer a long growing season. These can live for over a year in tropical climates and until the first frost in temperate climates. They can grow to be over 10 feet tall.
Indeterminate varieties are great if you have a long growing season, adequate space, and are willing to do some minor management. They also save you from having to replant for continued production. Most of the exotic and highly prized heirloom varieties like “Sweet Million” or “Sun Gold” are indeterminate.
Growing Conditions for Growing Tomatoes Inside Apartment
Like all plants, Tomatoes require a specific set of growing conditions that are optimal for healthy and maximum production. If these growing conditions aren’t met, you will likely start to see symptoms in the plants via pests, pathogens, discoloration, and low production.
Pick A Better Spot
First of all, find the best spot in your apartment. A balcony or porch would be perfect. Determinate, Smaller tomatoes need direct, uninterrupted sunlight for about four to six hours a day to produce fruit. Temperatures should be in the range of 65 F or 18 C or more. Tomatoes don’t like temperatures that dip below 50 degrees. Its important to find a better location, South or West facing places or a sunny windowsill would be best choice.
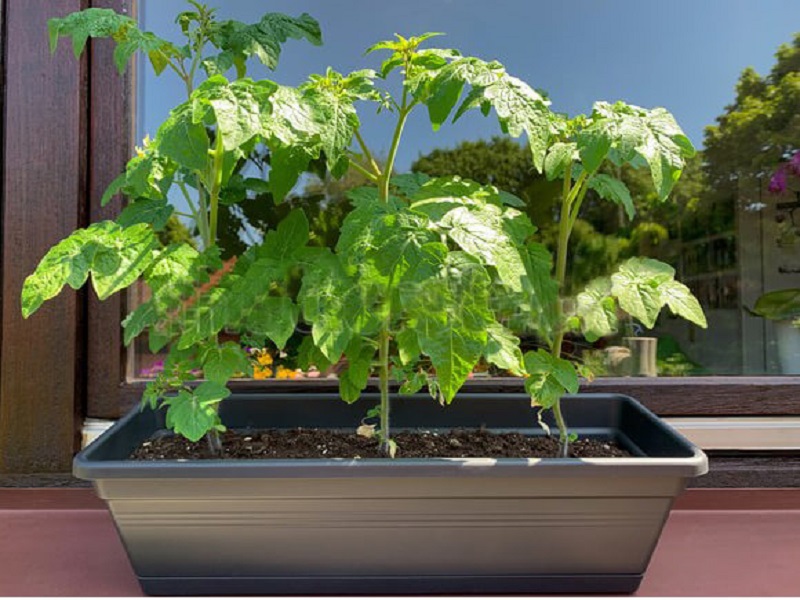
Choose Large Containers/Pots
“The bigger, the better” best verse for indoor tomato growing. Smaller containers might not be a good choice because tomato plants need a lot of space for having strong roots. To ensure success in growing tomatoes inside apartment it’s very wise to select a big enough container. Five-gallon buckets are the ideal size for one plant. Containers should have drainage holes, so be sure about that or drill at several places if none are present.
Healthy Soil
Having proper soil is one of the most important parts of growing tomatoes. You need soil that provides adequate air, water retention, nutrients, and biology in the form of beneficial microorganisms. Without right soil, your plants will likely suffer from disease and be stunted in growth. The best soil mix for tomatoes consists of roughly equal parts perlite, coconut coir, and rich compost.
If you plan to save some money by using readily available sediment-based soil (like what’s in your backyard) make sure that it is sandy and not heavy in clay. Sand will allow for proper drainage while clay soils may retain too much water and lead to disease. You can also find ready-to-go soil mix at almost any gardening centre or nursery. Look for “potting mix” as opposed to “potting soil” which may contain inorganic sediments.
Compost
Finally, test the pH of your soil to make sure it is somewhere between 6.8-7.2
When selecting your compost, make sure it’s homogenous, dark and made of fine particles. Avoid anything with large pieces of organic matter (leaves, stems, wood chips) or material that has not finished decomposing. One of the best indicators of healthy compost is a neutral smell, so make sure there are no unpleasant odors!
Unfinished or improperly made compost can host diseases, unwanted seeds, be low in nutrients, and not have the microorganisms you need. This compost will serve as the main nutritional component of the soil, aside from any additional fertilizers you may choose to add. A good alternative for compost is worm castings.
| Related Article: How to Prepare Soil for Vegetable Gardening? |
Temperature and Humidity
Tomatoes grow best in temperatures ranging from 65-85 degrees Fahrenheit, but certain varieties can handle colder/hotter temperatures. Keeping your temperatures under control is important because extreme cold or heat can stress your plants and have detrimental effects on production. If your indoor grow room has good temperature control then you want to attain temperatures around 80 degrees Fahrenheit for most varieties. If your grow room is more influenced by your environment’s climate, you may have to select for a more cold/heat tolerant variety and implement strategies to better control your climate.
One of the most important environmental conditions will be keeping the proper humidity. Tomatoes like daytime humidity around 80-90% and nighttime humidity between 65% to 75%. One of the most common mistakes is having high humidity levels which will greatly reduce the productivity of the plant. High humidity can be easily observed by excess condensation of water on the walls, roof, and surface of the plants. This can be controlled through proper ventilation, dehumidifiers, or heaters. If not properly controlled this can lead to harmful pests and pathogens.
Grow Light
For serious indoor growers, LED lights are often the most recommended. They have long lifespans, emit little heat, and consume the least amount of energy. LED grow lights have been shown to produce tastier and more nutritious tomatoes when compared to other grow lights. There are many different choices and brands when it comes to indoor grow lights.
The most important features to look for when selecting a grow light will be lifespan (40-60,000 hours is great), power usage (ranges from 100-700W) and coverage size. You will want to produce about 40W of light per square foot for ideal growth. The exact light that you chose will be dependent on how large your grow space is and how many plants you wish to grow.
Your plants will require approximately 16 hours of light per day. It is best to keep consistent timing to maintain your plant’s internal clock on a regular schedule. If you decide to control the lights manually, you risk stressing your plants by having an irregular light schedule. To increase the efficiency of your grow space you may also choose to line the ground and walls with a reflective material like mylar.
| Related Article: Top 10 Best Grow Lights for Indoor Plants |
Ventilation
Another important environmental control is being able to provide fresh air to your plants. Plants, like us, inhale Oxygen (O2) and exhale Carbon dioxide (CO2) which is a closed environment such as your grow room can lead to low levels of oxygen that can harm your plants. For this reason, proper ventilation is important. Depending on your conditions this can be as simple as opening your doors and windows or might mean creating a whole ventilation system.
In cold climates,
You may decide to ventilate during the day when temperatures are at the highest and isolate it at night to avoid a night-time frost. Having one or a couple moving fans (depending on the size of the room) is important to help move the air inside and also strengthen the stems of the plants.
Essential Materials For Growing Tomatoes Inside Apartment
The Equipment needed for growing tomatoes inside apartment is pretty straight forward, but there are many ways to obtain the same results. Ideally, you will be using the materials that are most readily available and trusted in your region.
- Tomato seeds
- Starting trays
- 4” diameter pots
- Large 5-10 gallon pots or containers
- Drainage plates
- 1 six-foot stake (1×1” wooden stakes are great) per plant
- Equal Parts Perlite, Potting Mix, Compost, Coconut Coir (or Sphagnum); about 1.25 gallons of each per plant. Also would recommend 1/2 gallon of activated biochar per plant if available.
- LED Grow Lights (40w per square foot) and timer.
Grow Tomatoes Inside Apartment: 7 Step procedure
Step 1- Starting Seeds
The first step for growing tomatoes inside apartment is planting your seeds. Most growers start their seeds indoors around the end of winter/beginning of spring.
If your indoor environment is not severely affected by your season, you can start seeds any time of the year! Ideally, you will be starting them around 1-2 months before you transplant into your final production grow space.
In these instructions we are recommending 2 transplants; one from a seedling tray to 4” pots (2-3 weeks in) and another to their final containers (3-5 weeks after).
Seedling trays come in various sizes and are typically composed of an inner 2-3” deep tray with slits and drainage holes at the bottom. You should have a slightly larger drainage tray that holds water beneath it. You will start by filling the trays with soil mix leaving a 1/2” of space between the soil surface and the rim of the tray. Fill the outer tray with no more than 1” of water and let the soil absorb the moisture from below.
This is preferable to watering from above because it preserves a more aerated soil structure. Wait about 30 minutes for the moisture to absorb and remove any excess water from the lower tray. Then, continue by placing single seeds 3” apart on the soil surface and then filing the rest of the tray with soil. Now, very gently mist the surface of the tray to moisten the soil. Avoid allowing any water to accumulate on the soil surface or applying too much water pressure that may disturb the soil.
You now want to keep your tray moist and around 70-75F. If you have any issues maintaining moisture, you can cover the tray in plastic to retain moisture. After about 1 week, the seeds should begin to germinate and you’ll want to move them below your grow light for about 16 hours a day. In about 2-4 weeks your plants will set out their third pair of leaves indicating its time for their first transplant.
Step 2- First Transplant
Once your plants have their third leaves, you will move them to a new pot and allow them to develop independently and become more vigorous before transplanting to their final home.
If you have more seedlings than you need just select the most vigorous and healthy plants.
Start by filling your 4” diameter pots with your soil and leave at least a 1/4” of space to the rim. Place pots in a drainage plate and fill with 1” of water, wait 30-60 minutes for the water to be absorbed.
If the surface of soil still seems dry, add more to the tray and wait. Once the surface is moist you can remove any excess water from the tray. Prepare a hole in your soil about 2” deep. Once your pot is ready, gently dig out your young seedling from the tray with a spoon, being careful not to damage any roots.
Place the seedlings in the pot burying all the roots and even the bottom pair of leaves (more roots will grow here and make for a sturdier plant). Place your new pots under your grow light for 3-5 weeks until your plants are 10-12” tall. Gentle watering will likely need to happen once every 2-3 days depending on the environment. Make sure that your soil is moist but never saturated with water. Be sure to empty water catchment trays/plates appropriately.

Step 3- Second Transplant
Once your plants are about 1 foot tall, they will be ready to transplant into their final containers.
Make sure the root structure is well developed and the soil is moist for better transplants. Fill these containers with moist soil, leaving 1” of space to the rim.
Dig a hole slightly bigger than the pot and transplant your young plant into the container. Again, feel free to bury the bottom 2 leaves, for extra support. Bury a sturdy 6-foot wooden stake (1×1” is fine) 1 foot into the soil directly adjacent to your plant. Your plant may not seem to need it yet, but it will eventually and adding the stake now reduces future root damage.
If your plant is already lanky, you can gently tie your plant to this stake using a trellising string to give it more support. In arid climates, you may have to water once every other day, but in more humid climates maybe only every 3-5 days. Make sure your soil is always moist, but be careful not to overwater. Infrequent deep watering are often the best for tomatoes.
Step 4- Trellising, Pruning and Guiding
Eventually, you will likely need a structure for your plants, particularly if they are indeterminate growers. Determinate growers will be fine with a central stake and a circular store-bought tomato cage. On the other hand, indeterminate vining tomatoes like tall structures and often need support for their heavy fruits.
How you do this will largely depend on your space, accessible material, size of your grow, varieties and specific context. Cherry Tomatoes and other small fruit-producing varieties can be supported on string trellising connected to your roof or rafters. Larger Heirloom tomatoes will need more support.
A simple and inexpensive structure is attaching 3-4 feet of metal fencing to your central stake using u-nails. Depending on the fencing available you may need extra horizontal support. If growing many plants, you can connect the central stakes using the fencing. An alternative is using wire (string may work with some small fruit varieties) horizontally across your central stakes.
Indeterminate varieties require a bit more attention as they begin to develop.
First, you should be routinely pruning new shoots or “suckers” that grow from the axils of your plant (located in between your main stain and leaves). This will cause the plant to grow taller and with a single stem until your plant makes its first flowers.
Above your first flowers, choose a sucker to form a new stem guiding it horizontally along your trellis. You can continue choosing suckers on alternating sides along your main stem. Ideally, you will keep it to 4-5 stems maximum to ensure the production of large high-quality fruits.
Step 5- Watering, Amending and Feeding
Like mentioned before, the best way to water your plants is with deep infrequent watering. Allowing your pot to dry out a little encourages better root development and thus stronger plants with more access to nutrients. Using rainwater is recommended for inside apartment gardening, especially if you live in an area with treated or contaminated tap water. While some may recommend using a moisture detector, you can easily do this by feel. Just stick your finger 2-4 inches into the soil, away from the plants base, being careful not to affect the main roots, and see if there is still any moisture.
If it’s dry, give about 10-20% of your container’s volume worth of water to your plant (5-gallon container would mean 0.5-1 gallon of water). Make sure to use a watering can that delivers a gentle and well-dispersed quantity of water. If using a hose, consider purchasing a spray gun or nozzle that will reduce the water pressure and rate at which your water is released.
Once your plant begins flowering, it will be good to give it additional fertilizers. Kelp is highly recommended to increase yield because of the large number of micronutrients it contains. It is most effective diluted into water and given during your usual watering. About 1/4 cup of kelp per gallon of water every 2-3 weeks. Follow directions of the specific brand you are buying.
Tomatoes typically do best with lower nitrogen and higher phosphorus fertilizer; a 5-10-10 fertilizer is ideal.
Vermicompost tea is great for providing nutrients but also promotes the beneficial microorganisms necessary for healthy plants. This probiotic tea can be made by putting 4=5 cups of vermicompost into a compost tea bag and placed into 5 gallons of unchlorinated water with one ounce of unsulfured molasses. Place in a bubbler (ideally intended for compost tea, but aquarium aerators work as well) for 48 hours to aerate the tea. This will create a probiotic liquid fertilizer that can also be applied as a beneficial foliar spray.
Conventional fertilizers provide bulk nutrients for your plants and can be crucial for maximizing yield. The three main nutrients in these fertilizers are nitrogen, phosphorus, and potassium (often seen as N-P-K). Their quantities are described in fertilizer packages by displaying 3 numbers that correspond to the three nutrients previously mentioned in that same order. Be very careful with these fertilizers and follow the indications as mentioned in their package. Too much can cause serious damage to your plants.
Step 6- Maintenance, Care and Pests Control
Well-nourished and taken care of tomato plants should exhibit little issues when it comes to pests. While you will likely see small amounts of infection by pests on all tomato grows, a catastrophic invasion will only happen when the growth requirements of the plants are out of balance. If the temperatures are too cold or too hot, if there’s not enough ventilation, or perhaps it’s lacking sufficient nutrients. When this happens, there is a wide array of options available on how to treat these issues.
Firstly, try to fix any issue you may see regarding the environmental conditions, consider trying to reach more optimal temperatures, humidity and increased ventilation.
Secondly, figure out your specific pest and look for available options that match your budget and horticultural philosophies.
For aphids and whiteflies you can make homemade sprays from dish soap or neem oil that can work well, alternatively, there are more chemical-based options. Bt is a beneficial bacteria you can purchase to help with beetles or you can opt for a pesticide known as pyrethrum if you want something more aggressive. Copper sprays are a great option for any foliar fungal diseases. Research your options well and make sure to take caution with any chemical pesticide as it can lead to health problems in the individual applying it and those who consume the final product. Read instructions very carefully and apply as stated.
Tomatoes are self-pollinating and most varieties are quite successful at it. If you notice that you are having issues with your flowers maturing into fruit, you can try the following to increase successful pollination. It can be as easy as shaking the plants or turning the speed of your fans up. Tomato flowers are adapted to the buzzing of bees and thus can also be stimulated by vibrations from a tuning fork (250 Hz), electric toothbrush, or special pollination vibrators placed behind the flowers. If done properly you will see large quantities of pollen released from the flower. Alternatively, you can use a small paintbrush or cotton swab.
Step 7- Harvesting
Finally, after all your hard work and effort comes time to harvest. Immature tomatoes are a dark green that will eventually begin to blush red as the fruit ripens. The first sign that the tomato is ripening is this faint change in colour. While tomatoes can ripen off the vine, the sweetest and most delicious tomatoes are vine-ripened. You may want to harvest green tomatoes for various reasons.
If you have a large production, it makes harvesting less labour intensive as well as provides a product that is better for transport.
Secondly, certain pests will only attack mature fruit, and thus harvesting it early protects you from this issue. Even still, you do need to wait for the tomato to reach its final size before you harvest. Conveniently mature unripe fruit will also be a lot easier to remove from the plant than immature fruits. To properly remove the fruit gently hold the stem in one hand while pulling the fruit with the other. This will ensure that you do not damage your plant, which is particularly important in long-lived varieties.
Special Tips For Growing Tomatoes Inside Apartment
Growing tomatoes is one of the most satisfying things you can do, and growing them inside apartment is much simpler than many people think. There are a thousand different philosophies around how to do it and none are wrong or right! It just depends on your specific context and what practices work for you and your lifestyle. Ultimately, tomatoes are very hardy plants that can produce a large amount of food with little effort. I hope this text was informative and inspires you to give growing tomatoes inside apartment a shot!
Here are a few extra tips to keep in mind when growing indoor tomatoes!
- Be careful watering! Don’t spray the foliage as this can burn the leaves of the plant and promote disease. Don’t over-saturate your soil because this can compromise the biology of your soil and lead to root rot. Don’t apply heavy water pressure to your soil as it can get your foliage dirty and expose roots.
- Use the right material for trellising! Pieces of cloth and thick strings are best for tying your plant as they’ll be the least likely to cause any damage. Tie your knots loosely, especially near the young tips of the plant, these are the most sensitive. Once the stem ages, you can tie a tighter knot and not damage the plants.
- Talk to local gardeners and producers in your area! There is so much when it comes to understanding a local environment that cannot be explained by even the greatest foreign experts. See if you can find seed locally from people that have had success and experience with it, it may be more locally adapted to your climate.
- Don’t be afraid to experiment, but take notes on what you do! Once you start building a relationship with your plants, you may be called to try something new that you think might help it become more productive. Go ahead and try, but make sure to document and take notes of everything you do, so you know what does and doesn’t work. No one does anything perfectly the first time, so continue your efforts until you are satisfied with the results. Growing Tomatoes Inside Apartment is a science and an art, so it will take time to develop the best strategy, technique, and set up to maximize your yield!
Happy Gardening!!